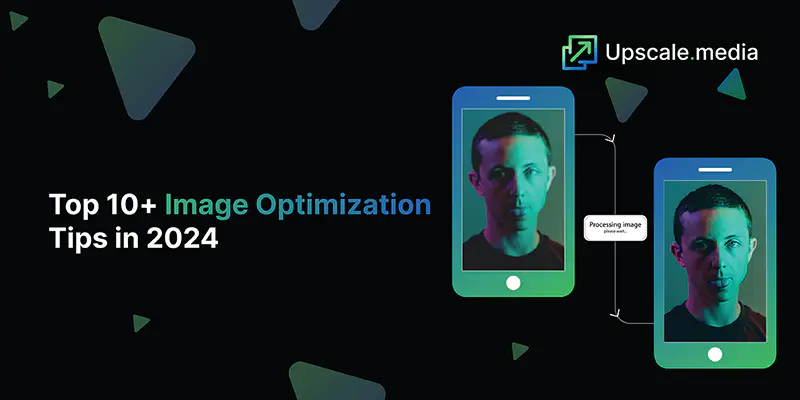
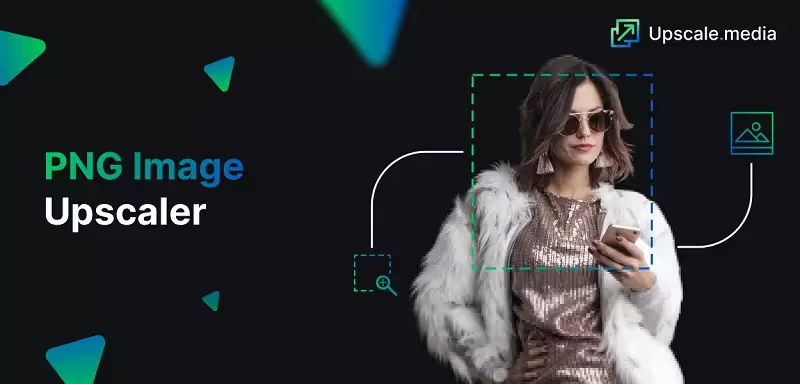
Top 10+ Image Optimization Tips in 2025


In today's digital age, image optimization is essential for anyone looking to create a visually stunning and fast-loading website. High-quality images can capture the audience's attention, but if optimized, they can speed up your site, leading to a better user experience. At Upscale.media, we understand the importance of balancing visual appeal and performance. Our advanced AI technology offers the perfect solution for the seamless optimization of images, ensuring they look impeccable while maintaining optimal loading speeds.
Imagine transforming your website with crystal-clear visuals that load instantly. With Upscale.media, you can effortlessly achieve this. Our AI-powered tools take the hassle out of image optimization, automatically enhancing and compressing your photos without sacrificing quality. Whether you're a business owner, a blogger, or a digital marketer, optimizing your images is crucial to standing out in the competitive online landscape.
Let Upscale.media be your trusted partner in elevating your online presence. Our user-friendly platform ensures that the optimization of images is a breeze, allowing you to focus on what truly matters – creating engaging content and connecting with your audience. Join thousands of satisfied users who have experienced the transformative power of our image optimization tools and see the difference for yourself.
What is Image Optimization?
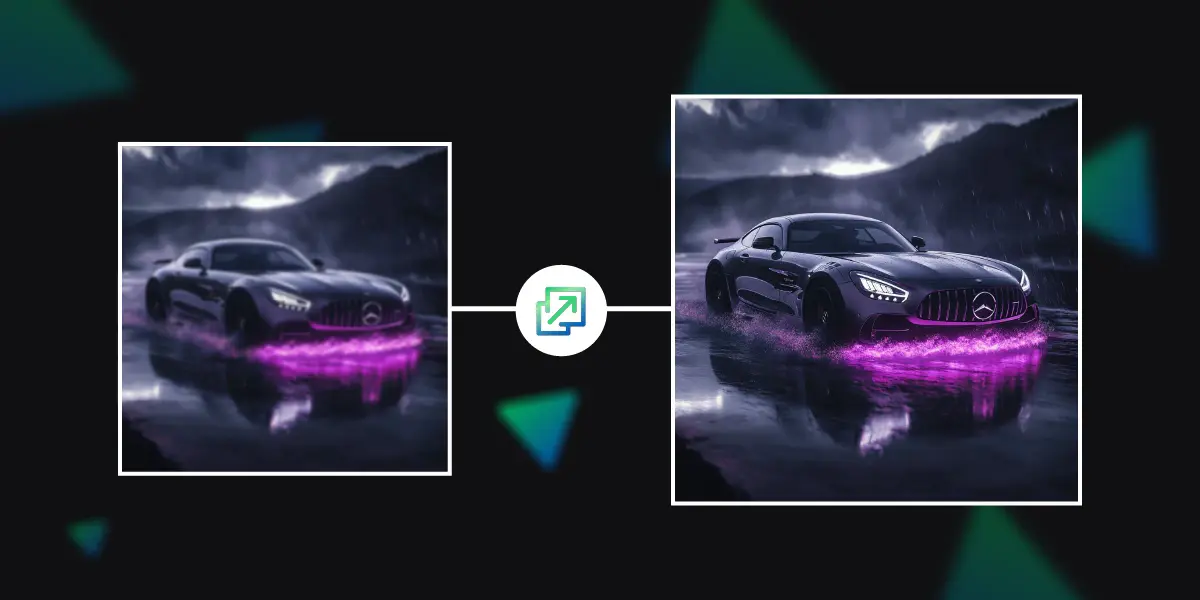
Image optimization is the process of adjusting and compressing images to improve website performance without sacrificing quality. This involves selecting the appropriate file format (such as JPEG, PNG, or WebP), resizing images to fit the intended display dimensions, and reducing file sizes through compression techniques. Optimized images load faster, which enhances user experience, boosts SEO rankings, and reduces bandwidth usage.
Tools like Upscale.media leverage advanced AI technology to streamline this process, automatically enhancing and compressing images while maintaining their visual appeal. Properly optimized images are crucial for responsive web design, ensuring that visuals look great on all devices, from desktops to smartphones. By focusing on image optimization, businesses can create visually engaging websites that perform efficiently, providing a seamless experience for their audience.
Top 12 Image Optimization Tips in 2025
Image optimization is essential for maintaining a fast and efficient website. By refining and compressing your images, you ensure quicker load times and a better user experience without compromising visual quality. Proper optimization involves selecting the right format, resizing images appropriately, and using modern compression techniques.
This not only enhances page speed but also boosts SEO and reduces bandwidth usage. Whether you’re a website owner or a digital marketer, mastering image optimization helps you deliver high-quality visuals while keeping your site running smoothly. Discover how you can enhance your images effectively with these top optimization tips.
Choose the Right Image Format

Choosing the right image format is a crucial step in image optimization. Different formats serve different purposes, and selecting the appropriate one can significantly impact both image quality and file size.
- JPEG: Ideal for photographs and images with gradient colors, JPEG offers a good balance between quality and file size through lossy compression. It’s perfect for web use where high resolution is less critical.
- PNG: Best suited for images requiring transparency or sharp edges, such as logos and icons. PNG uses lossless compression, retaining high quality but often resulting in larger file sizes compared to JPEG.
- WebP: A modern format that combines the best features of JPEG and PNG. WebP supports both lossy and lossless compression, offering superior quality at smaller file sizes, which can enhance load times and overall performance.
- GIF: Mostly used for simple animations. GIFs are limited in color depth and can result in larger files for animated images, making them less suitable for high-quality web graphics.
By choosing the right format, you ensure that your images are optimized for both visual appeal and performance, contributing to a faster, more efficient website.
Compress Images Without Losing Quality
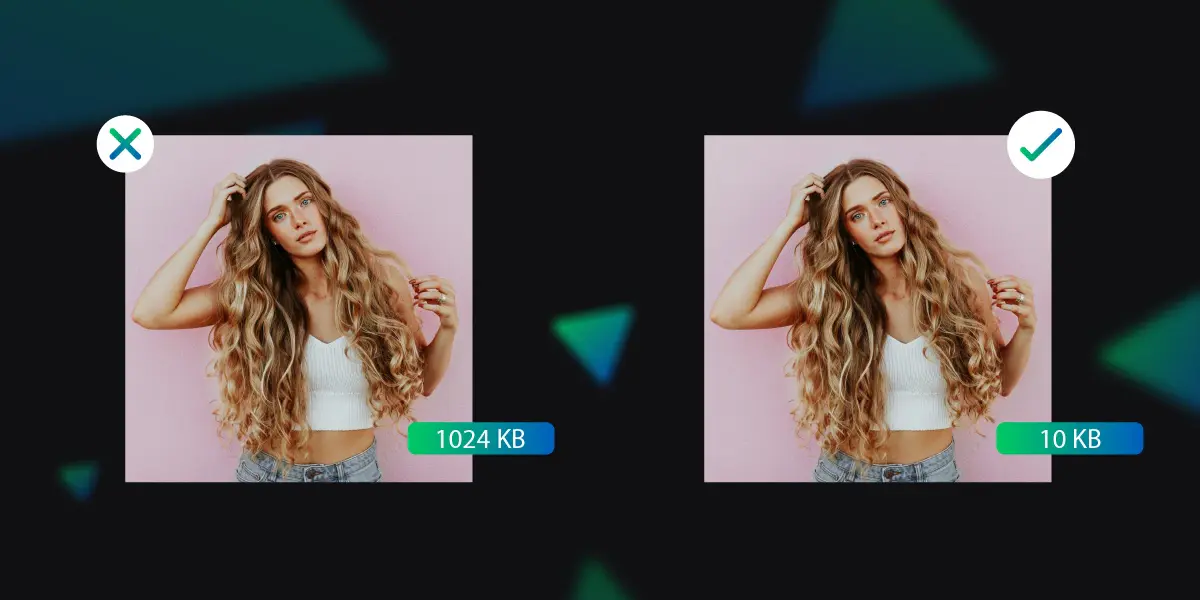
Compressing images without losing quality is a key strategy in the optimization of images, ensuring faster load times while maintaining visual integrity. Here’s how you can achieve effective compression:
- Use Lossless Compression: This method reduces file size without sacrificing image quality. Formats like PNG and certain tools for JPEG compression use lossless techniques to maintain original detail while decreasing file size.
- Leverage Advanced Compression Tools: Tools like Upscale.media offer AI-powered compression that optimizes images while preserving their visual appeal. These tools adjust compression settings to find the perfect balance between quality and file size.
- Adjust Quality Settings: For formats like JPEG, adjusting the quality setting can help manage file size. Aim for a balance where the file size is reduced, but the image quality remains acceptable. Tools often provide previews to help find the right setting.
- Remove Unnecessary Metadata: Images often come with embedded metadata that adds to file size. Use image editing tools to strip out unnecessary metadata, which can help reduce the overall file size.
- Resize Before Compressing: Resize images to their intended display dimensions before compressing. This ensures you’re not compressing a larger-than-needed image, which can help in maintaining quality while optimising file size.
By applying these techniques, you can effectively compress images to improve website performance without compromising on visual quality.
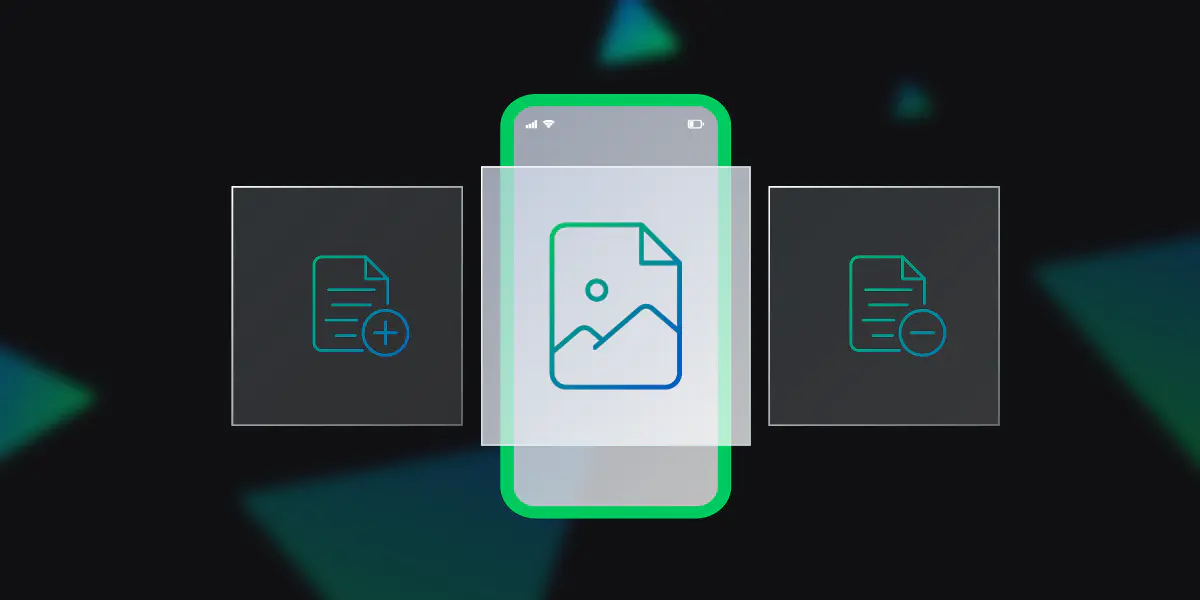
Utilize Lazy Loading
Utilizing lazy loading is an effective technique for image optimization that enhances website performance and user experience. Lazy loading ensures that images are loaded only when they enter the viewport or visible area of the user's screen rather than all at once when the page first loads. Here’s how lazy loading can benefit image optimization:
- Faster Page Load Times: By deferring the loading of off-screen images, lazy loading reduces the initial page load time. This means users can access content more quickly, improving overall site speed and reducing bounce rates.
- Reduced Bandwidth Usage: Lazy loading minimizes the amount of data transferred by loading images only as needed. This is particularly beneficial for users with limited data plans or slower internet connections, as it conserves bandwidth.
- Improved User Experience: With lazy loading, users see the content they are interested in faster, as images below the fold (not immediately visible) are loaded only when scrolled into view. This results in a smoother, more responsive browsing experience.
- Enhanced SEO and Performance: Search engines like Google consider page speed as a ranking factor. Implementing lazy loading can contribute to better SEO rankings by improving page load times and overall site performance.
To implement lazy loading, you can use native HTML attributes like loading="lazy" for images or incorporate JavaScript libraries that support this functionality. This approach helps streamline image delivery and optimize website performance, making for a more efficient and engaging user experience.
Optimise Image Dimensions
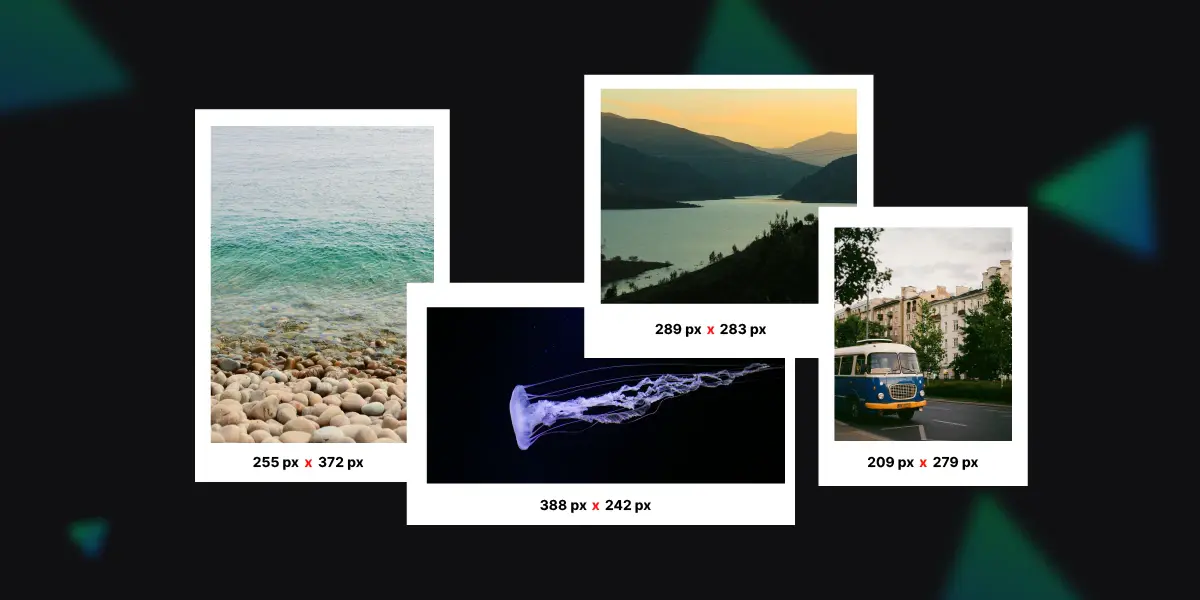
Optimizing image dimensions is a critical aspect of image optimization that ensures images load efficiently while maintaining their intended quality and impact. Here’s how to effectively manage image dimensions for better performance:
- Resize to Fit Display: Adjust images to match the dimensions required for their display on the webpage. Avoid using larger images than necessary, as they can increase load times and consume more bandwidth. Resize images to their exact display size or slightly larger if needed.
- Use Responsive Images: Implement responsive images using HTML's srcset and size attributes. This technique allows different image sizes to be served based on the device’s screen resolution and viewport size, ensuring optimal loading for all devices.
- Maintain Aspect Ratio: When resizing, keep the aspect ratio consistent to prevent distortion. This ensures that images look natural and professional without being stretched or compressed unnaturally.
- Leverage Image Cropping: Crop images to focus on the most important part of the visual. This not only reduces file size but also improves the relevance of the image content by removing unnecessary background or details.
- Optimize for Different Devices: Ensure images are optimized for various devices, including desktops, tablets, and smartphones. Use different image dimensions and resolutions tailored for each device to enhance performance and visual appeal.
By optimizing image dimensions, you ensure that images are appropriately sized for their display, which helps reduce loading times, improve user experience, and maintain the overall performance of your website.
Optimizing images for Google Lens
Optimizing images for Google Lens is crucial for ensuring your visuals are effectively recognized and utilized by this powerful tool. Google Lens uses advanced image recognition technology to analyze and understand images, providing users with relevant information and search results. Here’s how to optimize images for better performance with Google Lens:
- Enhance Image Clarity: Ensure images are sharp and clear, with high resolution. Blurry or low-quality images can hinder accurate recognition. Use high-resolution images that are well-lit and properly focused to improve the chances of accurate identification.
- Use Relevant Keywords: Include descriptive filenames and alt text for your images. This metadata helps Google Lens understand the context and content of the image, making it easier for the tool to categorize and search for similar visuals.
- Avoid Over-Editing: While enhancing images, avoid excessive filters or edits that may alter the true representation of the content. Google Lens relies on the authenticity of the image to provide accurate results, so maintaining a realistic appearance is key.
- Incorporate Contextual Elements: Include contextual elements in your images, such as recognizable objects, text, or landmarks. This helps Google Lens to identify and understand the content better, leading to more accurate and useful search results.
- Optimise Image Size and Format: Use appropriate image formats (JPEG for photos, PNG for graphics) and ensure the file size is manageable without compromising quality. Large image files may load slowly, impacting the overall effectiveness of recognition.
- Regularly Update Content: Keep your images current and relevant. Outdated visuals may perform poorly with Google Lens, as the tool relies on recent and accurate data to provide meaningful information.
By following these optimization tips, you can enhance how Google Lens interacts with your images, leading to better recognition, search accuracy, and overall engagement.
Use Image CDN for Faster Delivery
Using an Image CDN (Content Delivery Network) is an effective strategy for optimizing images and ensuring faster delivery across the web. Here’s how an Image CDN enhances image optimization:
- Global Distribution: An Image CDN distributes your images across multiple servers worldwide. This means that when a user accesses your website, the images are served from the nearest server, reducing latency and speeding up load times.
- Optimized Image Delivery: CDNs often include features to automatically optimize images based on the user's device and network conditions. This can include resizing, compressing, and adjusting image quality to balance speed and visual fidelity.
- Caching for Speed: CDNs cache images at various edge servers. This reduces the load on your origin server and speeds up image delivery by serving cached copies directly to users, even during traffic spikes.
- Improved Performance: By offloading image delivery to a CDN, your website’s performance improves, resulting in faster page load times and a better user experience. This can also positively impact SEO, as search engines favor faster-loading websites.
- Adaptive Formats: Many CDNs support modern image formats like WebP, which provide superior compression and quality. An Image CDN can automatically serve these formats to compatible browsers, further enhancing loading efficiency.
- Enhanced Security: CDNs offer security features such as DDoS protection and secure delivery. This ensures your images are not only delivered quickly but also securely.
Implementing an Image CDN can significantly boost the performance of your website, providing a seamless and rapid user experience while optimizing image delivery.
Optimise Alt Text for SEO
Optimizing alt text for SEO is a key component of image optimization that enhances both accessibility and search engine visibility. Here’s how to effectively optimize alt text:
- Use Descriptive and Relevant Keywords: Include specific and relevant keywords that accurately describe the image content. This helps search engines understand what the image is about and improves its chances of appearing in search results related to those keywords.
- Be Concise and Clear: Write concise, clear alt text that provides a straightforward description of the image. Aim for a brief yet informative text, typically 100-125 characters, that conveys the image’s essential details without being overly verbose.
- Avoid Keyword Stuffing: While incorporating keywords is important, avoid overloading the alt text with excessive keywords. Focus on creating natural and meaningful descriptions that enhance the user experience rather than just targeting search engine rankings.
- Include Contextual Information: Ensure that the alt text provides context that complements the surrounding content on the page. This helps both search engines and users understand the image’s relevance in relation to the rest of the content.
- Describe Textual Content: If the image contains text, such as infographics or screenshots, include that text in the alt description. This ensures that users who rely on screen readers can access the information conveyed by the image.
- Use Unique Alt Text for Each Image: Avoid duplicating alt text across multiple images. Each image should have its unique description to improve the accuracy of search results and enhance the overall SEO of the page.
- Consider User Intent: Think about what users might search for when looking for images similar to yours. Craft your alt text to align with these search intents, making your images more discoverable and relevant.
Optimizing alt text not only improves SEO but also enhances accessibility for visually impaired users, making your content more inclusive and engaging.
Reduce Image File Sizes for Mobile
Reducing image file sizes for mobile devices is crucial for optimizing load times and improving user experience. Here’s how to effectively manage image file sizes for mobile:
- Choose the Right File Format: Opt for efficient file formats such as JPEG for photos and PNG for graphics with fewer colors. Modern formats like WebP offer superior compression and quality for both types of images, making them ideal for mobile optimization.
- Resize Images Appropriately: Scale images to fit mobile screens. Avoid using large, high-resolution images that are unnecessarily large for mobile devices. Resize images to match the dimensions required for mobile views to reduce file size without compromising quality.
- Compress Images: Use image compression tools to reduce file sizes while maintaining acceptable quality. Tools like TinyPNG or ImageOptim can compress images effectively, minimizing load times and bandwidth usage on mobile devices.
- Implement Responsive Images: Use HTML’s srcset attribute to provide different image sizes for various screen resolutions and sizes. This allows mobile devices to load smaller, optimized images, improving performance and reducing data consumption.
- Leverage Lazy Loading: Implement lazy loading to defer the loading of images until they are visible in the viewport. This reduces initial load times and saves bandwidth by loading images only when necessary.
- Utilise Image CDNs: Employ an Image CDN that automatically optimizes images for mobile devices. CDNs can resize, compress, and deliver images based on device characteristics, ensuring fast and efficient image loading.
- Remove Unnecessary Metadata: Strip out metadata from images, such as EXIF data, which can increase file size without adding value. Tools like ImageOptim or JPEGmini can help remove this extraneous data.
- Use Image Compression Tools: Utilize tools and plugins that offer automated compression for mobile images. These tools often provide settings to balance between quality and file size effectively.
By reducing image file sizes for mobile, you enhance load times, improve user experience, and optimize data usage, leading to a more efficient and enjoyable mobile browsing experience.
Enable Browser Caching for Images
Enabling browser caching for images is a powerful strategy for optimizing image loading times and improving overall site performance. Here’s how to effectively implement browser caching for images:
- Understand Browser Caching: Browser caching allows web browsers to store copies of your images locally on a user's device. When users revisit your site, their browser can load the cached images from their local storage instead of downloading them again, which speeds up page load times.
- Set Cache-Control Headers: Use HTTP headers to control caching behavior. Set Cache-Control headers in your server configuration to specify how long browsers should cache images. For example, Cache-Control: max-age=31536000 instructs browsers to cache images for one year.
- Leverage Expiry Headers: Implement Expires headers to define an expiration date for cached images. This tells browsers how long they should store the images before checking for updates. Setting a long expiry date for static images can reduce server load and improve loading speed.
- Use Versioning: Include version numbers or unique query strings in your image URLs (e.g., image.jpg?v=1.0). When you update an image, changing the version number ensures that browsers fetch the latest version while still benefiting from caching for unchanged images.
- Configure Your CDN: If you’re using a Content Delivery Network (CDN), configure caching settings through the CDN’s management console. Most CDNs provide caching controls that allow you to set cache duration and manage image delivery efficiently.
- Check Cache Settings Regularly: Periodically review and test your caching settings to ensure they are working as expected. Tools like Google PageSpeed Insights or browser developer tools can help you verify that images are being cached correctly.
- Optimise Cache for Mobile and Desktop: Ensure that caching settings are optimized for both mobile and desktop users. Consistent caching policies across devices enhance performance and user experience universally.
- Clear Cache When Necessary: When making updates to images, ensure that cache invalidation strategies are in place to prompt browsers to load the new versions. This prevents users from seeing outdated images due to cached versions.
By enabling browser caching for images, you can significantly enhance website performance, reduce server load, and deliver a smoother, faster experience for users. This optimization technique is vital for maintaining an efficient and user-friendly site.
Use AI Tools for Image Enhancement
Using AI tools for image enhancement is a cutting-edge approach to optimizing images, ensuring high quality and efficiency. Here’s how to effectively leverage AI tools for optimizing your images:
- Improve Image Quality: AI tools can enhance image clarity and detail by analyzing and correcting imperfections. These tools use advanced algorithms to upscale images, reduce noise, and improve sharpness, ensuring your visuals look crisp and professional.
- Automate Enhancements: AI-driven image enhancement tools automate the process of adjusting brightness, contrast, and color balance. This eliminates the need for manual adjustments and speeds up workflow while ensuring consistent results across multiple images.
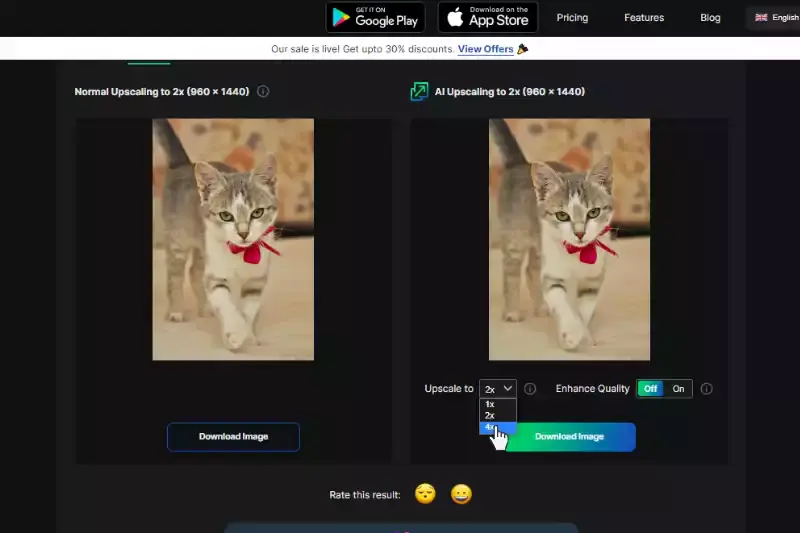
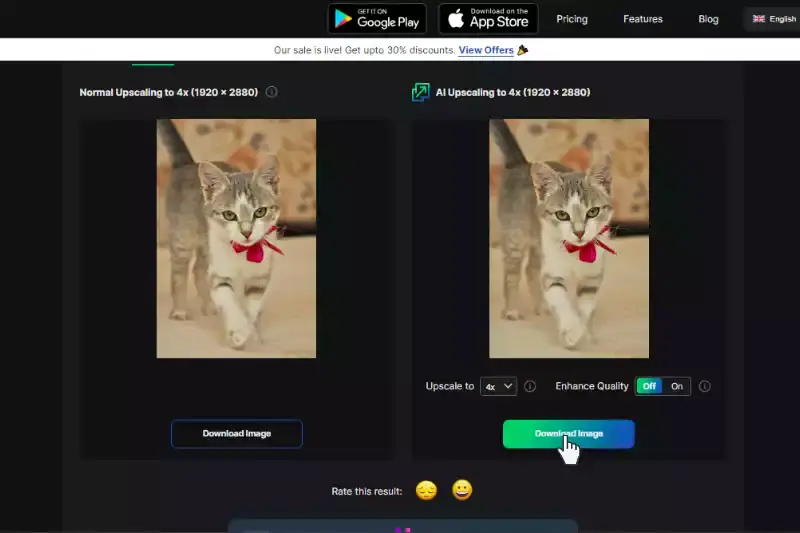
- Upscale Images: AI tools can upscale images to higher resolutions without losing quality. By using algorithms that predict and add detail, these tools can effectively enlarge images, making them suitable for high-resolution displays and prints.
- Reduce Artifacts: AI tools are adept at removing artifacts and imperfections from images. Whether dealing with compression artifacts or blurriness, AI can clean up images to ensure they look their best.
- Enhance Details and Textures: AI tools can enhance textures and fine details in images. This is particularly useful for applications such as product photography or detailed graphics, where high levels of detail are crucial.
- Optimize for Different Platforms: AI tools can automatically optimize images for various platforms and devices. They adjust image properties to ensure the best quality and performance, whether for web, mobile, or print.
- Batch Processing: Many AI image enhancement tools support batch processing, allowing you to apply enhancements to multiple images simultaneously. This saves time and ensures uniform quality across all images.
- Use AI for Specific Needs: Depending on your needs, you can use specialized AI tools for tasks such as background removal, facial enhancement, or color correction. These tools provide targeted improvements, enhancing the overall effectiveness of your image optimization strategy.
Include IPTC Photo Metadata
Incorporating IPTC (International Press Telecommunications Council) photo metadata is an essential practice for optimizing and managing images. Here’s how including IPTC metadata can enhance your image optimization strategy:
- Enhance Image Organization: IPTC metadata allows you to embed detailed information about each image, such as captions, keywords, and descriptions. This helps in organizing and retrieving images more efficiently, ensuring that you can quickly locate and utilize them for various purposes.
- Improve Searchability: By including IPTC metadata, you enhance the searchability of your images. Keywords and descriptive tags embedded in the metadata make it easier for search engines and image databases to index and retrieve images based on specific criteria.
- Provide Context and Licensing Information: IPTC metadata can include contextual information such as the photographer’s name, copyright details, and usage rights. This helps in protecting intellectual property and ensuring that images are used correctly according to licensing agreements.
- Facilitate Workflow Automation: Metadata can streamline workflows by providing essential details directly within the image file. Automated systems and tools can read this metadata to apply processing instructions, categorize images, or trigger specific actions based on the embedded information.
- Support Archiving and Backup: When archiving or backing up images, IPTC metadata remains embedded within the image file, ensuring that crucial information is preserved along with the visual content. This aids in maintaining a comprehensive record of your image assets.
- Ensure Consistency Across Platforms: IPTC metadata helps maintain consistency when images are used across different platforms. The metadata remains intact regardless of where the image is displayed or used, ensuring that all relevant information is consistently available.
- Optimise Metadata for SEO: Properly structured IPTC metadata can enhance SEO by including relevant keywords and descriptions. This improves the visibility of your images in search engine results and helps drive traffic to your website.
- Ease of Image Management: IPTC metadata simplifies image management by allowing you to embed various types of information within the image file itself. This reduces the need for external documentation and keeps all relevant details together with the image.
Broken image links
Broken image links can significantly impact the user experience and overall performance of a website. Addressing this issue is crucial for effective image optimization and maintaining a seamless browsing experience. Here’s how to manage and resolve broken image links:
- Regularly Check for Broken Links: Use tools or plugins to scan your website for broken image links regularly. These tools can automatically identify missing or incorrect image URLs, allowing you to address issues promptly.
- Update or Replace Missing Images: When a broken link is detected, update the image URL to the correct path or replace the missing image with a suitable alternative. Ensure that all images are properly linked and accessible to prevent broken links.
- Implement a Robust File Management System: Maintain a well-organized file management system for your images. This includes using consistent naming conventions and folder structures, which helps avoid broken links due to misplaced or incorrectly named files.
- Utilise Image CDN: Using a Content Delivery Network (CDN) can help manage and deliver images efficiently. CDNs often have built-in mechanisms to handle broken links and provide alternative solutions, ensuring a consistent user experience.
- Monitor Image Hosting Services: If your images are hosted on third-party platforms, monitor these services for potential issues. Ensure that the external hosting service is reliable and that your images remain accessible.
- Use Proper Error Handling: Implement error handling techniques, such as fallback images or custom error pages, to manage broken image links gracefully. This provides users with a better experience even when an image fails to load.
- Optimise Image Paths: Ensure that image paths are correct and relative to the root directory if possible. Absolute paths should be carefully managed to avoid broken links if the website structure changes.
- Update URLs During Website Changes: When updating your website’s structure or moving content, ensure that all image URLs are updated accordingly. This helps prevent broken links from occurring due to changes in the site’s layout or file locations.
- Implement Redirection Strategies: For images that have been moved or renamed, use redirection techniques to guide users and search engines to the new image location. This helps in maintaining the continuity of image access.
- Check for User-Submitted Content: If your site allows user submissions with images, regularly review these submissions to ensure that the image links provided are valid and working.
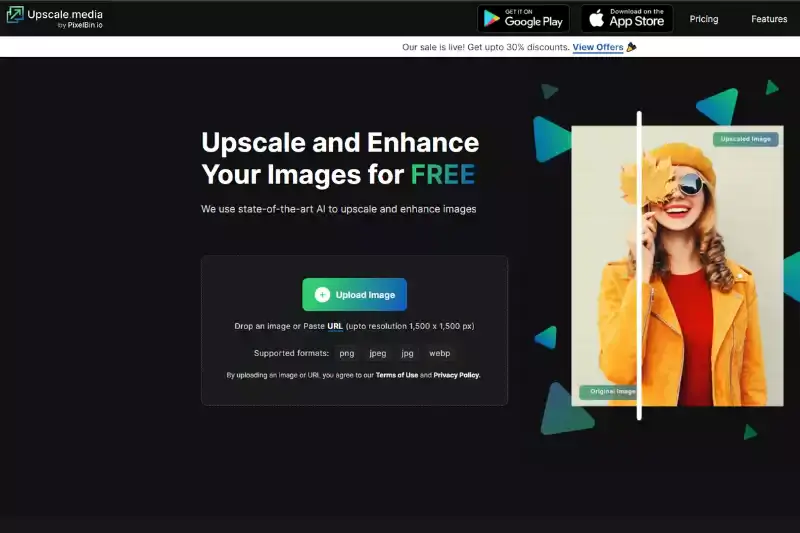
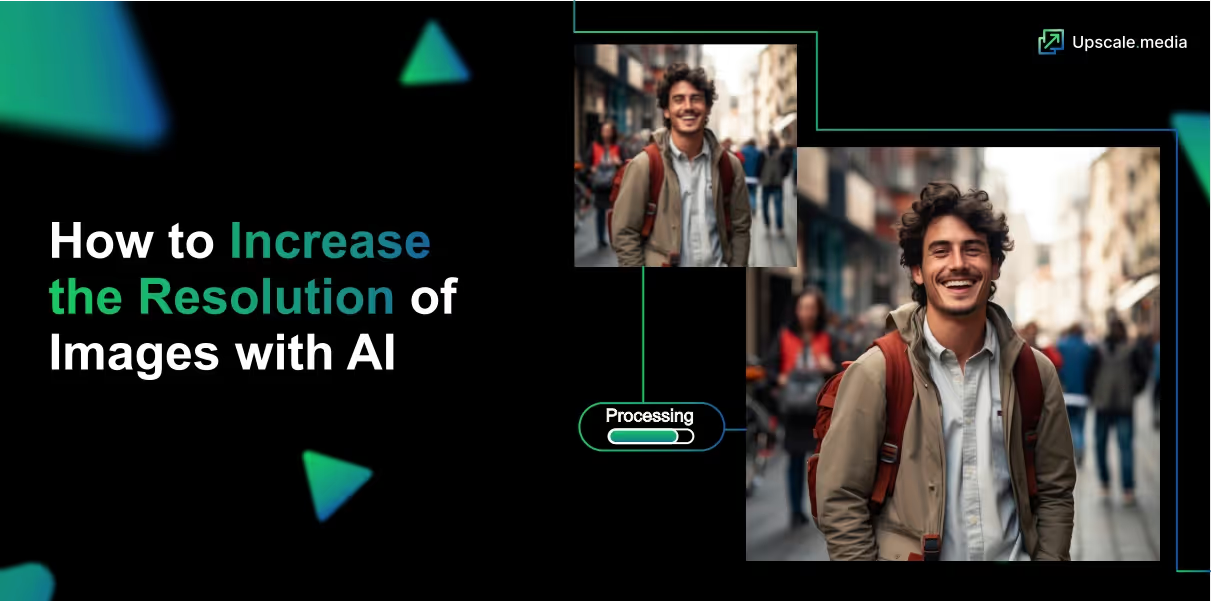
Upscale & Enhance your Images Online for Free
Looking to enhance and upscale your images effortlessly? Upscale.media offers a powerful solution for transforming your photos with ease. Whether you need to upscale your images to a higher resolution or enhance their quality, Upscale.media provides a seamless, free tool that supports various file formats, including PNG, JPEG, JPG, WEBP, and HEIC.
With just a few clicks, you can significantly improve your images, ensuring they look sharp and vibrant. Our intuitive platform makes it easy to upload and upscale your photos without compromising on quality. Discover the benefits of AI-driven image enhancement and get stunning results with Upscale.media today.
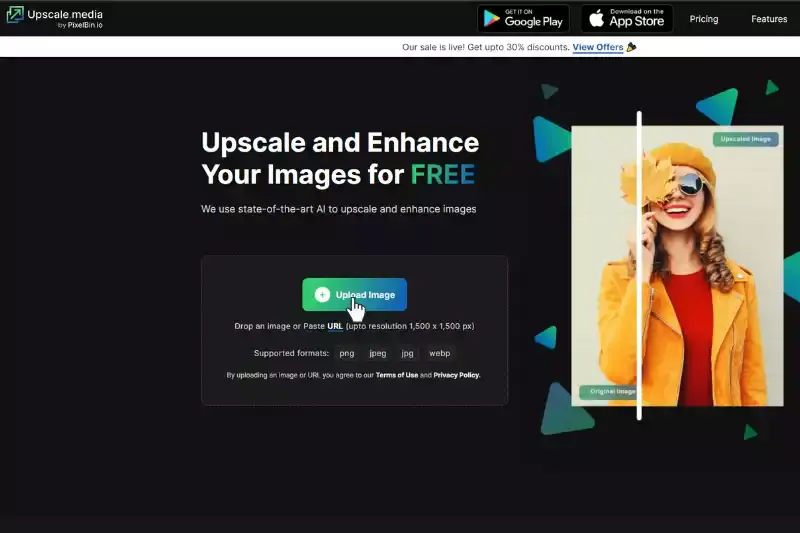
Step 1 - Go to the website browser, type Upscale.media & press enter. If you are a smartphone user, you can install the App from Google Play Store or the iOS store.
Step 2 - Click Upload Image, drop the Image or paste the URL.
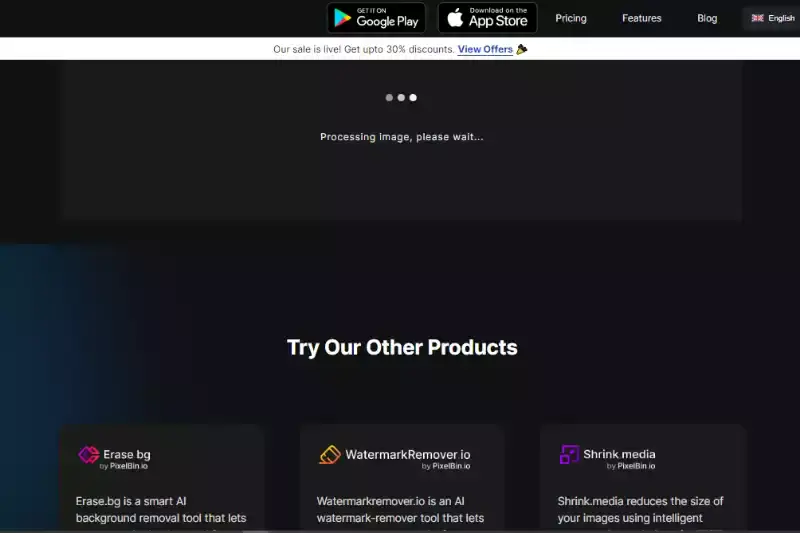
Step 3 - The application says, "Processing image; please wait"
Step 4 - Click the option "Upscale image upto 4X" or change the enhance quality button to ON.
Step 5 - Click the button "Download Image".
Conclusion
Optimizing images is crucial for enhancing website performance and user experience. By compressing files, using the right formats, and implementing responsive images, you can significantly improve load times and SEO rankings.
Additionally, always prioritise alt text for better accessibility and search engine visibility. Regularly updating and auditing your images ensures they remain optimized. Embrace these practices to create a visually appealing and efficient website, ultimately leading to higher engagement and conversion rates.
FAQ's
Is PNG or JPG better for SEO?
Both PNG and JPEG can be effective for SEO purposes, but JPEG is typically more favoured due to its smaller file sizes, leading to faster load times—a critical factor in SEO. However, PNGs should be used when preserving image quality or transparency is a priority, as long as the file sizes are kept in check for optimal site performance.
Why do we optimize image?
Image optimization is important for improving the speed and performance of a website, as well-optimized images load faster and consume less data, leading to a better user experience. Moreover, optimized images contribute positively to SEO (Search Engine Optimization), as search engines prefer websites that load quickly and efficiently.
Do image names affect SEO?
Yes, image names do impact SEO. Search engines not only crawl the text on your webpage but also crawl your image file names. Descriptive, keyword-relevant image file names are more likely to get your images indexed and help convey the topic of your content to search engines, potentially improving your page's search visibility.
What is the best file size for SEO?
For optimal SEO and site performance, it's recommended to keep image file sizes as small as possible without compromising quality. Typically, a good target to aim for is an image file size of less than 100 KB. However, the appropriate size can vary depending on the specific image's complexity and the display size on your website.
What is an example of image Optimisation?
An example of image optimization would be taking a large, high-resolution photo file and reducing its size using compression algorithms without significantly compromising its visual quality. This might also include changing its format (e.g., from PNG to JPEG), renaming the image file with relevant keywords for SEO, and adding alt text for improved accessibility and search engine indexing.
What is image optimization in seo?
Image optimization in SEO refers to the process of optimizing images on a website to improve its search engine ranking and overall performance. This involves reducing image file sizes to improve page load times, providing descriptive and keyword-rich file names and alt text for better search engine indexing, and using the appropriate image formats (JPEG, PNG, etc.) for different types of images. By optimizing images, websites can enhance user experience, increase their visibility in search engine results, and potentially attract more organic traffic.
.avif)
.avif)
.avif)